
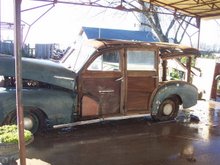
The partial fender behind the front fender, and the rear fender are mounted to fender rails that are both constructed in a similar way. They both are designed to follow the curve of the fender, which would be difficult to achieve using a single piece of wood. Joining wood end to end this way is normally going to be a relatively weak joint. The only effective surfaces to glue are the face grain, as opposed to end grain, which is pretty much useless to glue. A finger joint like the ones found on these parts is quite strong. To give you a better idea you can look at the fact that you have about 10 sq. inches of face grain glued fo
 r every 1 1/2" of thickness.
I made what I felt was an improvement over the original design on the rear fender rails.They are made up of two rails laminated together for an overall thickness of 3".The original rails had the finger joints aligned across the two sections. I think this was probably due more to the necessity of efficiency in production. I kept the joints in the same location on the outside sections of the rails to maintain the look of the original. On the inside sections of the rails I staggered the joints so the finger joints on one section would be supported by solid wood next to it.
Both of these pieces were very deteriorated, so I started by making full size templates from 1/4" plywood. I then marked out where the joints were located on each piece. I set up the finger joint cutter so that when the fingers were cut on one piece the mating piece was cut by flipping it upside down to minimize the number of set ups and adjustments that neede to be made. Once I got the sections joind together, I passed them through the surface planer taking light cuts just until the joints were perfectly level. This would ensure the glue joints between the two pieces would be as seemless as possible.

The partial fender rails on the front doors are made the same way, except they are not laminated like the rear fender rails. Although they are thicker at about 2" for about 13 sq. inches of glued joint surface.

At this point I trace the templates I made onto the glued up sections ,and cut them out on the bandsaw, leaving a little material outside the line to remove with the belt sander , and hand planer. Once this was done I transferred the thicknesses from the original to the new stock , again cutting out on the bandsaw and finishing with the belt sander.

No comments:
Post a Comment