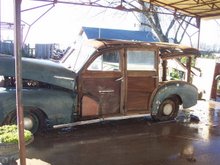
The next piece to make is the rear upright stile of the rear door. There is a saddle type joint at the top that fits with the rear door header assembly, dadoes or grooves that line up with grooves in the header for the window channel.along with a handful of other grooves and recesses for window and lock hardware as well as frame joinery and interior and exterior panels. When laying out the curve of this part the original had deteriorated quite a bit around the lock mechanism so I wasn't really able to use the pattern making bits as before. Also these pieces taper a slight 1/16th to 3/32nds of an inch from top to bottom. To accomplish this I made a sled that held up the back end of the stock half this distance. I would run the stock through a thickness planer, dropping the blade slightly between passes. Checking periodically with my caliper, once the bottom thickness was achieved the top had the correct taper. Next I traced the profile onto the dimensioned  stock ,restoring the fair of the curve where the original was damaged, and band sawed just shy of this line. I then used a oscillating sander to shape the piece until the line just disappeared. I compare frequently with the original.
 stock ,restoring the fair of the curve where the original was damaged, and band sawed just shy of this line. I then used a oscillating sander to shape the piece until the line just disappeared. I compare frequently with the original.
Once I was satisfied with the profile, I started laying out the joinery at both ends as well as the mortises and dadoes on both sides. If you can, test fit any of the hardware you have available on the new piece to see how it fits. When marking out the rest of your milling operations, try to be redundant. By this I mean Check and recheck your measurements from different points. Also make certain that the joinery on the new pieces will relate and fit together as it should.
When you start milling the pieces try to think a few steps ahead. make sure you don't remove material you will need later to register against the fence or to keep the piece level on the table on a following operation. A good rule to keep in mind is to remove the material first from the centers of the stock and then from the edges. also remember that you are making a mirror image of each piece, not a duplicate so everything is opposite. Its easy to get a little mixed up with the number of different operations involved in creating each piece.


No comments:
Post a Comment